Answers to the most common questions we get about our cargo lifts and passenger lift.
Cargo lifts may be used only to transport materials and are not approved for human transport. Passenger lifts can move both materials and people.
Both must meet all requirements for safe human transport. An elevator is defined by a fully enclosed cab and shaft, so a passenger lift is often a more affordable option.
Yes. Cargo lifts or a passenger lift can be installed indoors or outdoors.
Yes. Cargo lifts or a passenger lift can provide a strong ROI for a variety of commercial applications from warehouses and stockrooms to sheds and lofts.
No. The footplate for the travel beams can sit on a concrete pad or be buried 18″ underground.
The homeowner must provide the travel distance measurement and ensure compliance with all applicable POA/HOA regulations. Prior to installation, an electrical disconnect box must be mounted near lift location.
The Voyager+ and Voyager HD are perfect cargo lift solutions to accommodate the height of a 3-story building with either two or three stops.
Motor size can vary by type of lift and travel distance. The motor will always provide the best combination of economy and power with maximum safety.
Measure from the finished floor at your highest stop down to the landing point on the finished surface or ground.
No. A 50% deposit is required with your order to get the lift into production with the balance due at time of shipping.
Electrical and location preparation costs are not included. Installation cost and a shipping estimate will be provided along with the cost of the lift.
Yes. Our cargo lifts and passenger lift are backed by our warranty when registered within 30 days of lift installation: 5-year structural and 1-year electrical and mechanical parts. Review our lift warranty.
We strongly recommend professional installation of all our lift models. But the Shuttle was designed for Do-It-Yourself installation and can be installed professionally for your convenience.
Your remote and gel pad can be programmed for momentary or latching modes.
Momentary: you must hold the button down for the lift to move. Please read through these instructions thoroughly before starting. The control board will exit the programming mode after 7 seconds of inactivity; you may have to practice the steps a few times before programming your remote successfully.
1. Have all remotes present.
2. Press and hold the learn button on the Gel Pad until the green LED beside the button lights up (approximately 3 seconds).
3. Press the up button on each remote once, you will see a corresponding flash from the learn LED.
4. Give the learn mode 10 seconds to expire, you will see a rapid flash from the learn LED.
5. Now test the remote (s) to verify if the programming was successful.
Latching: press and release the button, and the lift will travel until you stop it or it reaches its limit. Please read through these instructions thoroughly before starting. The control board will exit the programming mode after 7 seconds of inactivity; you may have to practice the steps a few times before programming your remote successfully.
1. Have all remotes present.
2. Press and hold the learn button on the gel pad until the green LED beside the button lights up (approximately 3 seconds).
3. Press the up button once on each of the remotes and twice on the last remote.
4. Give the learn mode about 10 seconds to expire, then you will see a rapid flash from the learn LED.
5. Now test the remote (s) to verify if the programming was successful.
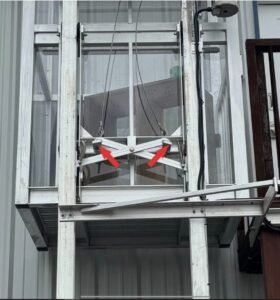
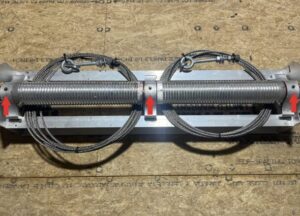
Note that before respooling, you must check if you have the brake assembly installed. See photo reference below.

Clamps must be applied to the brake arms to disengage the brake and allow normal travel during respooling. Make sure there isn’t any slack in the cables before disengaging the brake. The brake is located on the beam side of the basket, and it looks like the letter X.

Take precautions when removing the front panel from the control box. The front panel uses a ribbon cable to connect to the control board inside. This cable is fragile and can break easily. Try not to bend or crease this cable. Watch the video linked here to learn more, or fill out the form on our tech support page to talk to a specialist.
Yes, please make sure to grease your head assembly every six months with lithium-based grease.

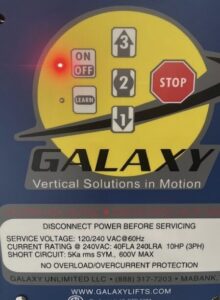
Check that there is power from the breaker and no blown fuses from the disconnect. If the light is off, fill out the form on our tech support page to talk to a specialist.
